Non-dedicated server
Dedicated server
Introduction
This article only refers to Windows operating systems. First of all you need Windows XP or above to get a server running. To be able to run a H&D2 server on newer Windows servers you need to install Direct Play.
Regarding UNIX systems we can host our H&D2 servers on FreeBSD and Linux. Special thanks to Paul and Mökki for their dedicated help.
Linux Server Hosting Tutorial (2021)
by Mökki Medium(aka JarnoKai)
FreeBSD Server Hosting Tutorial (2021)
by Paul Blair(aka ToadLife)
In HD2 you can choose between two server types, dedicated or non-dedicated, last you have to participate on the server as host whereas dedicated servers are running without host.
You can run and play on a dedicated server on the same machine. This gives you the advantage that if your game crashes, the server is still online and other players won't loose their connection.
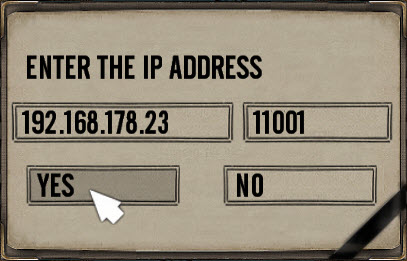
To join your own dedicated server, connect via your local IP address: launch HD2, navigate to MULTIPLAYER INTERNET, click on ENTER SERVER IP and enter your local IP and connection port. Update the list and your server should appear then.
Note: If you join via your internet IP other clients might get kicked!
What is my local IP adress?
- Click on the Start button.
- In the search box, type the following: cmd
- Click on cmd.exe in the search results listing.
- Command Prompt will now open
- Type ipconfig/all and press Enter
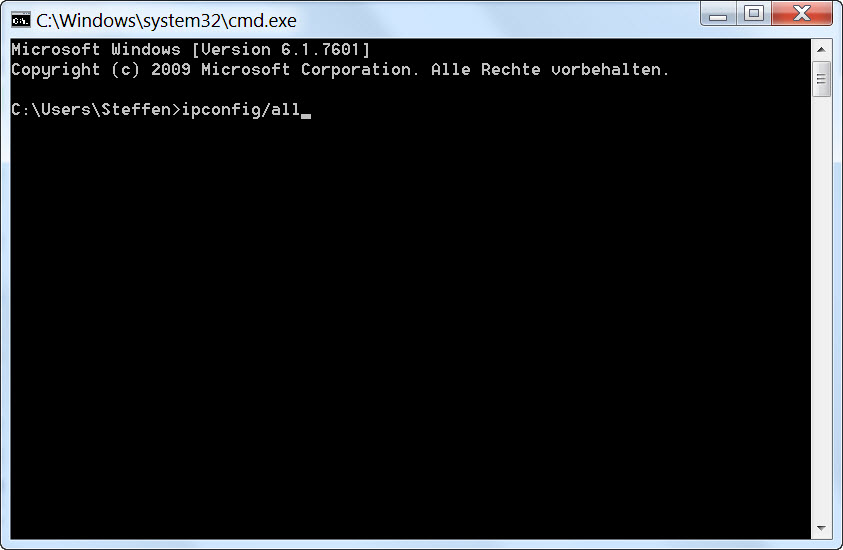
- Read off your IPv4 adress, e.g 192.168.178.23
H&D2 Server Hosting Tutorial
A complete guide to hosting H&D2 servers on Windows machines. Follow the simple and detailed instructions provided by Maletzki (aka Thomas Tailor). When you have any questions, please post them on our forum thread or on our Discord group. We greatly appreciate your efforts to keep the H&D2 community alive!
Basic steps & Knowledge
Run as administrator
If you are using Windows Vista or above make sure you run any HD2 relevant program as administrator!
Therefore right-click on the program and select "run as administrator"
If you don't want to repeat this step every time select "Properties", switch to "compatibility" -tab and tick "run as administrator". Apply and exit.
Install HD2
Self-evident you need HD2 (Sabre Squadron) installed and patched to latest version 1.12.
Download HD2 v1.12 patch via GoogleDrive
Download HD2 Sabre Squadron v1.12 patch via GoogleDrive
Forward ports
Each HD server is run on a specific set of ports which are blocked by your router and firewall software by default for security reasons. If you don't forward these ports on router and firewall, nobody is able to join your server but yourself.
Each server needs a specific connection port forwarded and the next three ports hereafter. (Last is called Query port) In the example below we run our HD2 server on port 11001, so we have to forward port 11001 to 11004 UDP protocol.
| 11001 | UDP | Connection Port |
| 11002 | UDP | |
| 11003 | UDP | |
| 11004 | UDP | Query Port |
| 2332 | TCP | Server Manager Client 2.9 |
To forward ports you have to log-in the router's admin panel. In most cases you connect over your browser with entering your local IPv4 adress or a router specific adress, e.g "fritz.box" or "dns" for Fritz! routers. Check your router manual for further information about forwarding ports or contact your internet provider. As there are many different router types out there, the panel always looks different. Same for firewalls. If you just want to test accessibility for now i'd recommend to disable the firewall for the time being.
If you need more help fowarding ports of a router please have a look at following website:
portforward.com
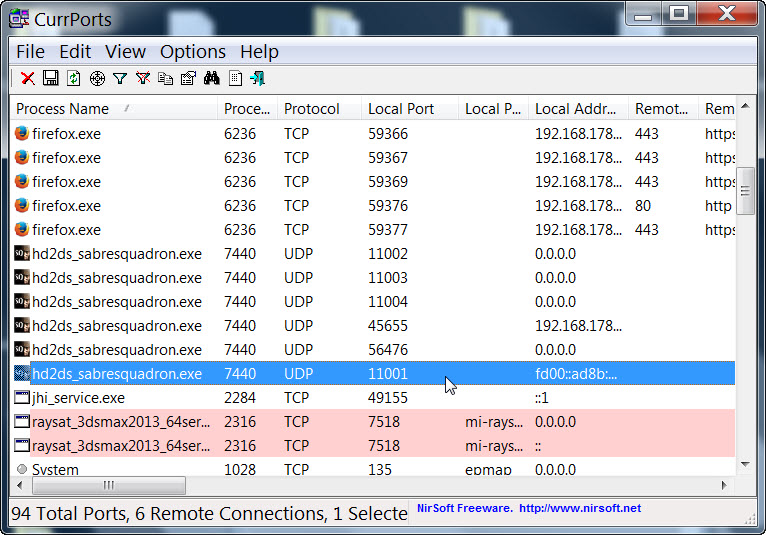
In case nobody can't access your server though you have forwarded ports as mentioned above, download CurrPorts and forward all listed ports which refer to HD2. Note: HD2 Server must be running.
IPv6 and IP Helper
Only mind this section if you are running a Windows version above XP. (Windows Vista, Windows 7, Windows 8)
In case you have to disable IPv6 protocol and the IP Helper service as described below.
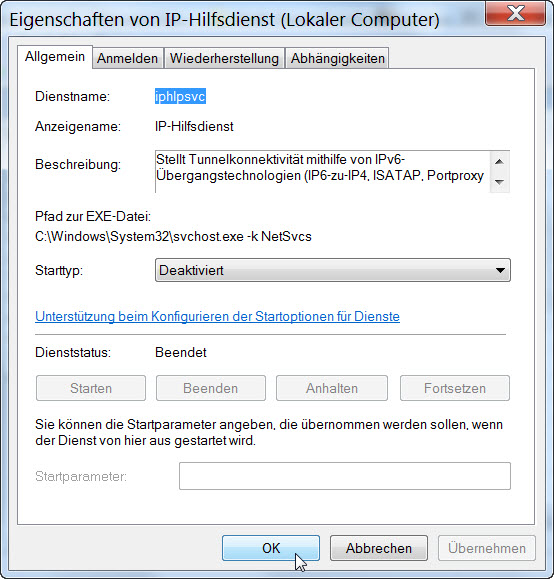
Step 1 Disable the IP Helper service
- Hold the windows key and type R, enter "services.msc" (without quotes) and press enter
- Scroll down to the IP Helper service, right click on it and select Properties
- In the dropdown box that says "Automatic" or "Manual", set it to Disabled and then click on "Apply"
- Then click on "Stop" to stop the service from running in the current session.
- Click OK to exit the dialog
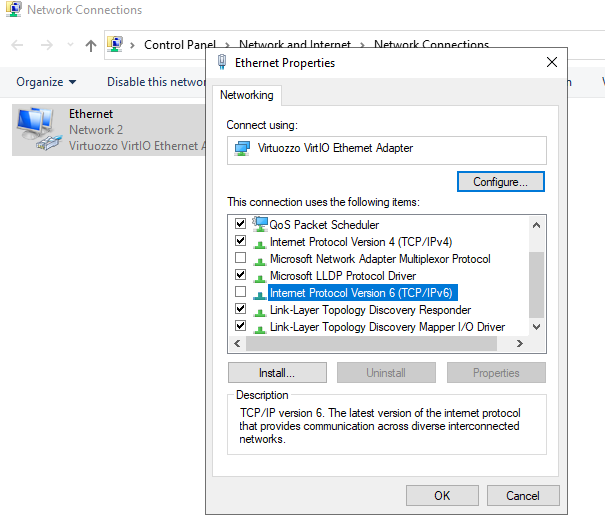
Step 2 Disable Internet Protocol version 6 (IPv6)
First, Ipv6 on the Ethernet Adapter has to be disabled as follows:- Right Click on the Computer icon in the tray
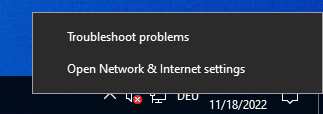
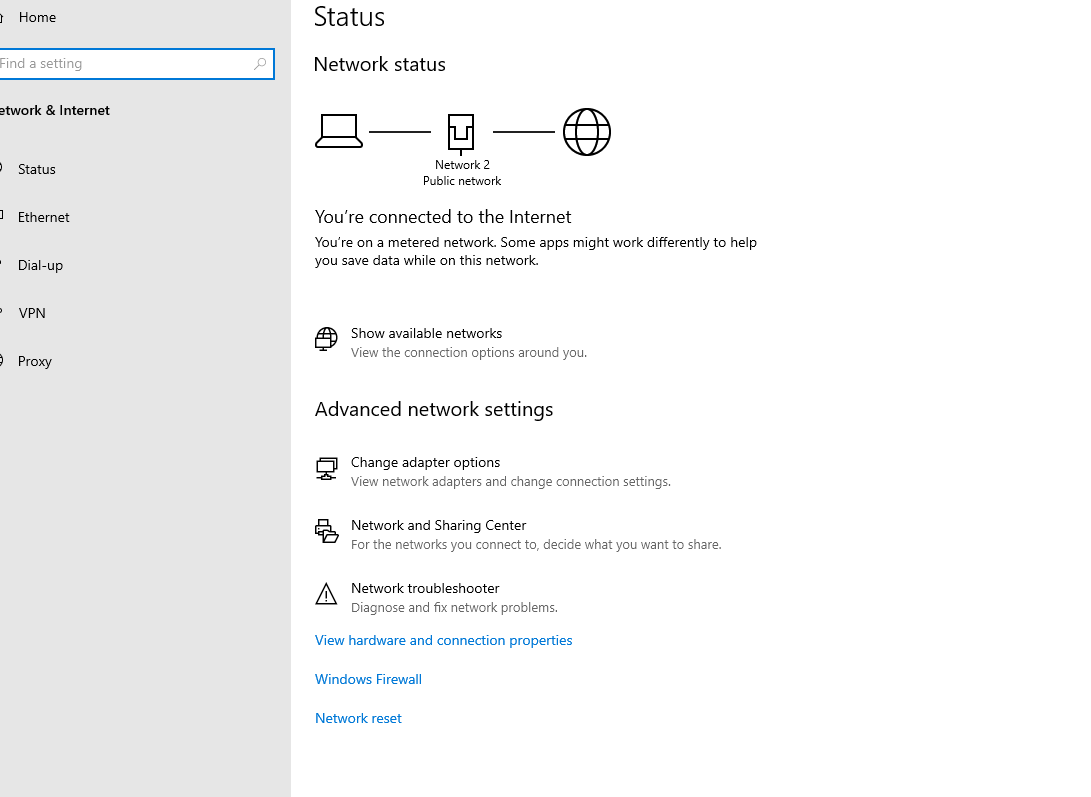
- Click "Open Network & Internet settings"
- Click "Change adapter settings"
- Right click on the Network Adapter and click "Properties"
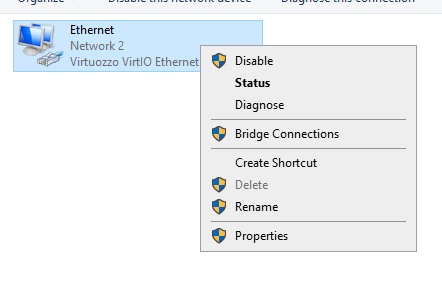
- Disable "Internet Protocol Version 6 (TCP/IPv6)"
HKEY_LOCAL_MACHINE\SYSTEM\CurrentControlSet\Services\Tcpip6\Parameters\There, you must add the following parameter, as REG_DWORD (32-bit), and Hex value:
Parameter: DisabledComponents

Hex Value: ffffffffStep 3 Reset TCP/IP Stack (not needed if rebooting system after Step 2)
- To open a command prompt, click Start and then type cmd in the Search programs and files box.
- Under Programs, right-click the CMD.exe icon, and then click Run as administrator.
- When the User Account Control box appears, click Yes.
- At the command prompt, enter the following command, and then press Enter:
netsh int ip reset c:\resetlog.txt
Note If you don't want to specify a directory path for the log file, run the following command instead:netsh int ip reset resetlog.txt - Restart the computer.
Non-Dedicated server
Make sure you have carried out the basic steps.
Via HD2 menu
Launch HD2 (Sabre Squadron)
Navigate to MULTIPLAYER GAME INTERNET → adapt server settings → CREATE SERVER
Dedicated server
Make sure you have carried out the basic steps.
Running a dedicated server can be achived manually or with Server Tools like the HD2 Server Launcher or the Server Manager 2.9.
Make sure you have ticked the Dedicated server box
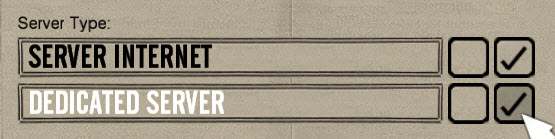
If you now click on START, HD2 is shut-down and a dedicated server gets launched.
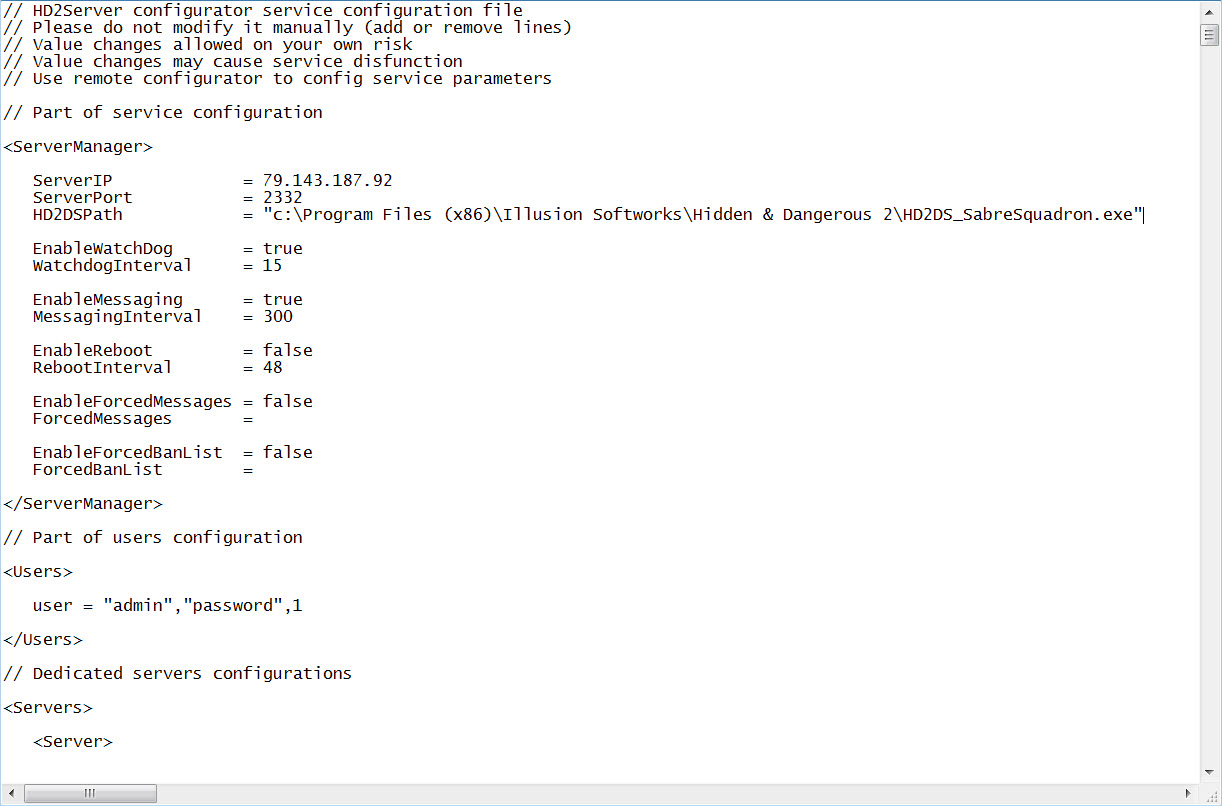
Server Manager 2.9
Extract the .zip file and move the HD2ServerManager.exe in a folder of your choice. Then launch the program. You now should see a HD2 icon in your system tray bar.
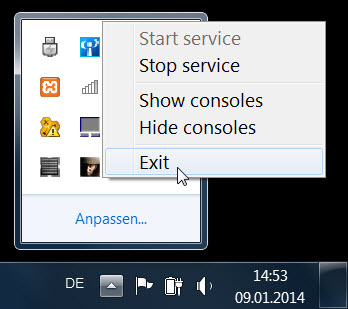
Exit the program again. This should create a config.txt file in the folder the HD2ServerManager.exe is located.
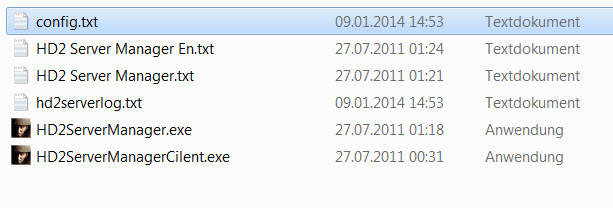
Open config.txt and enter the correct path to your HD2DS.exe (HD2DS_SabreSquadron.exe). Also choose an admin login name and password.
Server Launcher
If you're server is meant to run occasionally you should choose the in-built Server Launcher of HD2. The exe can be found in the main directory of your HD2 installation.
Manual
If you don't like the server tools mentioned above, of course you have the opportunity to launch HD2DS.exe (HD2DS_SabreSquadron.exe) and enter the required settings directly into the console. So you don't have to repeat these steps each time you have to re-launch your server, the exec command can be used for executing batches of commands to make starting dedicated servers quicker from the DOS command line. Assume that you have created two text files:
Name: server-occupation.txt
sessionname testserver
style occupation
mapname normandy3
mapname africa2
domain internet
dedicated 1
server
and
Name: server-objectives.txt
With the content:
sessionname testserver
style objectives
mapname africa3
mapname normandy1
domain internet
dedicated 1
server
Note: When entering the list of commands there has to be an empty line below last command. In this case that means pressing enter after typing “server”.
There are then two ways to create the server using either file.
Open the multiplayer dedicated multiplayer console window by typing “hd2.exe –c” in the DOS command line.
Then type “exec server-objectives.txt" or "exec server-occupation.txt” to start the preferred game server.
Alternatively execute the batch file without opening the dedicated multiplayer console window by typing "hd2.exe –cmd -exec server-objectives.txt" on command.